
Akira Ishida as Byakuya Togami (voice)
Episodes 13

Prologue: Welcome to despair High School
Makoto Naegi, an average student, enrols at the prestigious Kibōgamine Academy for talented students. However, the moment Makoto steps inside the school grounds, he falls unconscious and wakes up in a dorm room littered with security cameras and steel plates. Following a note's instruction to assemble in the gym, Makoto finds 14 other unique students in a similar situation, including a school idol from his old middle school, Sayaka Maizono. It is at this point that the self-proclaimed principal, a stuffed bear named Monokuma, appears, announcing that the students will be staying in the school for the rest of their lives, with only those who kill another student being able to leave. The students spend the next few days searching the school grounds in order to try and find an alternative exit. When Monokuma notices noone has any particular motive to kill anyone, he shows each student a personalised DVD motivating them to escape.
Read More
(Not) Normal Arc: Kill and Live
As Makoto tries to grow accustomed to the situation, he learns from Monokuma about the faulty door on his shower room. Afterwards, Sayaka comes to Makoto's room, saying she is afraid that someone may be after her, so Makoto offers to switch rooms with her to put her at ease. The next day, however, Makoto discovers his room in a mess and is horrified to find Sayaka lying dead in the shower room, having been stabbed in the stomach with a kitchen knife. As Makoto becomes angered by this tragic turn of events, Monokuma explains that one of the students is responsible for her murder and they must judge for themselves who the killer is in a "class trial". If the guilty culprit is successfully deduced, that person will be executed, but if they accuse the wrong person, then the culprit will get to escape the academy whilst everyone else will be put to death.
Read More
Not Normal Arc: Kill and Live
As the trial begins, swimmer Aoi Asahina testifies that she and martial artist Sakura Oogami witnessed Sayaka enter the kitchen, during which one of the kitchen knives, which was used as the murder weapon, was stolen. Meanwhile, Kyouko proves Makoto's innocence by pointing out that, since his shower room didn't have a lock, he wouldn't have needed to take apart the doorknob to enter it. After wondering how the culprit entered the room in the first place, Kyouko presents evidence which reveals Sayaka had purposely invited someone into the room, meaning that Sayaka had actually intended to murder someone and pin the crime on Makoto, only for her target to fight back and kill her instead. Remembering the message written in blood, Makoto deduces that "11037" is actually an upside down spelling of "LEON" and accuses baseball star Leon Kuwata of the crime.
Read More
(Not) Normal Arc: Weekly Shonen Despair Magazine
Following the class trial, Monokuma grants access to the second floor of the academy, containing a library and a swimming pool with gender-divided changing rooms. Whilst searching the library, the group find a broken laptop and a letter that indicates Hope's Peak Academy has actually been shut down for years, along with a storeroom filled with confidential files. As the pool changing rooms require ElectroIDs to unlock, Monokuma introduces a school rule that students are forbidden from exchanging their ElectroIDs. Later, Makoto comes across writer Touko Fukawa, who appears to have a thing for the cold-hearted affluent progeny, Byakuya Togami, before winding up as a witness to a sauna endurance battle between gangster Mondo Oowada and moral compass Kiyotaka Ishimaru, who end up bonding with each other.
Read More
Not Normal Arc: Weekly Shonen Despair Magazine
As the trial gets underway, Byakuya states that Touko is the culprit as she has dissociative identity disorder, her other personality being none other than Genocider Sho. Surely enough, as Touko faints, her personality switches to that of Genocider who, despite casually admitting she is a genuine homicidal maniac, denies killing Chihiro as she always uses scissors in all of her serial killings. Being the only other one who knew of Genocider's crimes, Byakuya is suspected of the crime, curiously not denying it. However, after Makoto deduces Chihiro was actually killed in the boy's changing room, with Kyouko subsequently revealing Chihiro was, in fact, a cross-dressing boy, Byakuya admits he is not the killer and had only modified the crime scene to make the game more interesting.
Read More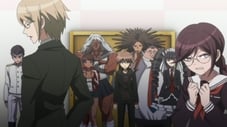
(Not) Normal Arc: Return of the New Century Galaxy Legend! O Armored Hero, Stand Upon The Earth!
After the others investigate the newly opened third floor, containing a rec room, art room and a physics lab, Monokuma announces his next incentive; a cash reward of 100 billion yen to whoever graduates, though noone seems to fall for it. Afterwards, the gang investigate the bath locker rooms after Aoi mentions seeing Chihiro's ghost the previous night, which turns out to be a laptop left behind by Chihiro before his death, containing an A.I. program called Alter Ego, who offers to help decrypt some files left on the laptop. As Kiyotaka, who has been mortified since Mondo's execution, asks Alter Ego if he blames him for Chihiro's death, he imitates Mondo to give him words of encouragement, which seems to encourage him a bit too much. Alter Ego then shows a curious photo of Leon, Chihiro and Mondo hanging together, which could not have possibly been taking during the time they've known each other.
Read More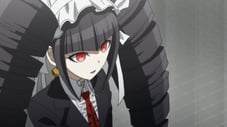
Not Normal Arc: Return of the New Century Galaxy Legend! O Armored Hero, Stand Upon The Earth!
Hifumi's dying words leave most of students convinced that the culprit is fortune teller Yasuhiro Hagakure, who is found by Kyouko near the pool stuck inside the aforementioned 'Justice Robo' costume. Yasuhiro, however, denies committing any murders, claiming he was knocked out after being called by a note, which had subsequently gone missing. After Makoto and Kyouko finish their investigation of the crime scene, the class trial begins, where Makoto starts vouching for Yasuhiro's innocence, using evidence to point out he couldn't have designed the outfit, let alone carry the corpses whilst wearing it. After Kyouko asks the court to consider the two murders as seperate incidents, Makoto deduces that Hifumi had only faked his death from before, with Kyouko's evidence revealing Hifumi was the one who killed Kiyotaka, moving his body to the art supply closet where he was killed himself.
Read More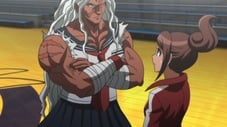
(Not) Normal Arc: All All Apologies
Makoto overhears that Sakura had been forced to become Monokuma's mole as he took her family hostage. As Makoto feels he should not jump to conclusions until he has talked to Sakura, Kyouko becomes annoyed with him for keeping secrets from her. After exploring the fourth floor, containing some locked rooms that Monokuma forbids breaking into, the girls catch up with Alter Ego, who reports that Hope's Peak Academy was placed under lockdown due to a terrible incident that occurred, theorising that the school's true principal may be the one pulling the strings. He also discovers another strange photo, this time of Sayaka, Celestia and Hifumi together. Afterwards, Monokuma announces to everyone that Sakura is the mole, hoping to bring about another murder. As Aoi becomes angered with the mean words said about Sakura, she ends up getting into a scrape with Genocider, leaving Sakura angered that innocent people got involved.
Read More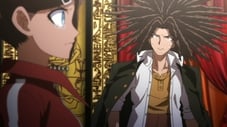
All All Apologies II
Following an investigation in the chemics lab, the class trial begins, where Touko reveals she, Byakuya and Yasuhiro received notes from Sakura calling them to the rec room, where she had witnessed Yasuhiro attack Sakura with a bottle out of fear. However, Yasuhiro being the culprit is ruled out when Makoto reveals Sakura had in fact been hit twice. This second hit is revealed to have come from Touko after she had passed out from seeing Sakura's bloody forehead and became Genocider, hitting her with another bottle. However, she is proven innocent as the place she attacked Sakura was different from where her body was found, with Byakuya revealing that the cause of death was actually poison, showing a bottle of poison that mysteriously contains protein shake. Aoi announces that she is the culprit, stating that she had replaced Sakura's protein shake with poison and gave it to her.
Read More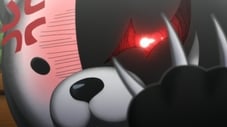
(Not) Normal Arc: The Junk Food of Despair for Racing Through Youth
Kirigiri steals Monokuma's "treasure." He warns the students that everyone will be held equally guilty. Later that night, Togami finds that Monokuma has gone out of order. The next day, there is a new body.
Read More
Not Normal Arc: The Junk Food of Despair for Racing Through Youth
Naegi and the others are forced to participate in an awkward classroom trial for a victim they don't know anything about.
Read More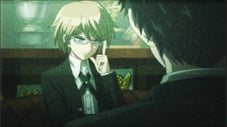
After being granted access to all previously locked rooms, Makoto and Kyoko investigate the dorm's second floor and find a hidden room in the headmaster's lodge. There, they discover the remains of Kyoko's father, who had died long before the killing game started, along with an SD Card containing video interviews of all the students agreeing to spend their lives in Hope's Peak Academy, although Monokuma pulls the plug before the video gets too far. Whilst Kyoko deals with the revelation that her father cared more about her than she thought, Makoto uses the headmaster's e-handbook to open some lockers, finding some textbooks allegedly belonging to Yasuhiro and a notebook containing Kyoko's handwriting, hinting at there being two 'Despair' students. Afterwards, Makoto visits the science lab, being used as a morgue, noticing some curious wounds on Mukuro's body before Monokuma gives him a photo featuring all sixteen students except for himself. As the class trial soon begins, with Monokuma joining the fray, the other students reveal they had also received similar photos, only with them missing from their respective photos. Wondering where these photos came from, Makoto reveals the books he found, deducing they are each missing some of their memories, revealed to have been stolen by Monokuma. Makoto then accuses Monokuma of murdering Mukuro, deducing that Mukuro was murdered twice, pointing out the true cause of death were wounds eerily matching the ones Junko received. After Kyoko proves her innocence by revealing the shameful burns on her hands, Makoto deduces from Monokuma's obscured evidence the identity of the culprit, Monokuma's controller, and the academy's mastermind to be none other than the real Junko Enoshima, who soon appears and reveals herself to be the true Super High School Level Despair.
Read More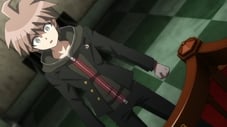
Goodbye, Despair High School
Now that the mastermind has been revealed, Naegi and his classmates must uncover the mysteries behind Hope's Peak High School during the final classroom trial. Can hope defeat despair or will the mastermind come out triumphant in the end?
Read More