
Mamoru Miyano as Bishop
Episodes 75
The Contract Hidden in the Maze
Kaito Daimon, an average high schooler is a genius at solving puzzles. Apparently, Kaito went to did a table Puzzle route in his school for some "tests" which was referred on his Device. Soon later, he went to look for the Puzzle Club President to inquire about this puzzle which Kaito found suspicious. While solving puzzles (On the device) given by this unknown person named "Minotaur", he completed all his puzzles, and suddenly, a invitation was sent to Kaito from the device, asking him to challenge the 'Sage Puzzle' in the ruins earlier in the episode scene, and to fulfill Orpheus's Contract, however if he failed to solve this puzzle, he will die. As he entered the route to the ruins together with Nonoha, Minotaur said he will be the one who will be watching him do this puzzle, and that the Sage's puzzle is a barrier with treasure sealed, to which Kaito quickly rejected accepting this gift. The first trial he had to do was solve a Sliding puzzle which was quickly solved by Kaito. The second trial was a start point - to end puzzle, this puzzle which Kaito had been bothered about. Kaito had decided to go to a specific deadend which confused Nonoha, she then decided to run while touching the walls to get them out, however, she encountered a trap which nearly got her done for. Kaito and Nonoha arrived at their destination (the dead-end), and Nonoha realised that there's a different between the pillar alignment compared to the rest she had seen. Kaito notices something that is not right, and got reminded of the puzzle he did in the first trial and asked Nonoha if she had seen a pillar with an axe logo. The pillar was found in front of them, and Kaito pulled down the pillar. A wall broke through and they managed to get to the exit. This is where the prize was kept, Minotaur asked Kaito to go alone, and he saw a Mandala. He touched the picture, and suddenly a golden chain chained his arm. Minotaur then told Kaito to use this golden ring to push his powers to the max his brain can handle. Slowly, water started to flow, hitting the supporting pillars of the ruins, Minotaur said that Kaito is to choose one of the three ropes in order to escape. Nonoha screamed with fear and suddenly, Kaito looked up in a state of shock, and his eyes changed to crimson red. He then solved the Sage's Puzzle.
Read More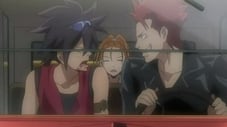
The Sage's Reward
In his powerful state known as 'Phi-Brain', Kaito manages to solve the puzzle, allowing them both to escape the ruins. Later, Kaito becomes annoyed by a puzzle solver named Gammon Sakanoue, who carries the title 'Galilleo'. As Kaito receives a request to solve another puzzle, Gammon tries to claim it for himself and ends up joining Kaito and Nonoha. The puzzle in question is a life-sized sliding puzzle in which the player must get their car out of the puzzle within a time limit before it is crushed by a falling truck. As Gammon nearly completes the puzzle, the puzzle giver cuts off the ability to move the car they are in, supposedly leaving them with no solution. However, Kaito once again enters his Phi-Brain state and manages to use the other vechiles in the puzzle to push their car out of the way before they are crushed.
Read More
The Genius Boy Melancholy
Kaito meets a boy genius solver named Cubic Galois, who carries the title of 'Edison' and prefers mathematics other puzzles. He attaches a strange bracelet onto Kaito's arm, which causes his head to hurt whenever he thinks about puzzles. At this time, Kaito, Nonoha and Gammon are called to solve a puzzle, with the city rigged to explode if they fail. Though Cubic tries to make things harder for Kaito to make him give up on puzzles, he soon learns that the puzzle giver is serious about blowing up the city. With less than two minutes remaining, Kaito enters his Phi-Brain state and solves the puzzle with a second to spare. Admiring his skill, Cubic apologises to Kaito and removes the bracelet.
Read More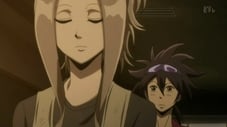
The Girl in the Secret Room
Kaito is given a Sage Puzzle to solve on the weekend, where he is to be partnered with Ana Gram, an art enthusiast who holds the title of 'Da Vinci'. They visit the mansion of a late artist, with its butler revealed to be a Giver from the POG. Kaito and Ana are trapped in a room which will fill with gas if they don't solve the puzzle. Presented with a jigsaw containing various famous paintings, Kaito and Ana work together to solve the puzzle, the treasure of which is a series of paintings the painter dedicated to his wife. Back at school, Kaito and Nonoha are surprised to find that Ana is a boy.
Read More
Invitation to a Nightmare
The POG extend an invitation to Kaito, who is accompanied by Nonoha and Gammon, to their headquarters. As the three make their way through the maze to meet with the POG's head, Kaito notices something eerily familiar about the puzzles they have to solve. This particularly holds true to the final puzzle, which is similar to a puzzle that took the lives of Kaito's parents. As Kaito goes berserk at the memory of it, Cubic helps Nonoka snap him out of it by shocking him with her cookies. Since this causes Kaito to pass out, the mysterious POG head cancels the meeting. After Kaito recovers, he finds himself having trouble solving even a simple puzzle.
Read More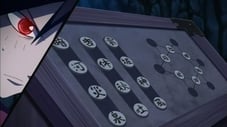
Restoration Towards the Light
Kaito is still tormented by his memories and unable to solve puzzles. Cubic researches into the Orpheus bangle, theorizing Kaito's breakdown was a result of his brain power being completely controlled by emotions. He advises Kaito to not solve anymore puzzles, as another breakdown could put his life in danger. However, because of a promise he made when he was younger, Kaito can't let puzzles go and accepts another puzzle request from the POG. Kaito soon comes across a complex Kenja Puzzle with Gammon and Nonoha's lives at stake. As Kaito goes through another breakdown, he remembers his promise and manages to regain his puzzle solving skills and solve the puzzle.
Read More
Nonoha`s Title
As Nonoha visits some kindergarten students, their teacher, Madoka, gives Kaito a letter, which the others suspect to be a love letter. Suspicious about the contents, Nonoha and Gammon follows Kaito to the meeting point, where it's revealed Madoka is a Giver following in her late fiancée's footsteps. Kaito, Nonoha, Gammon and Madoka, along with some children, become trapped in a Kenja Puzzle inside an abandoned building, which wasn't what Madoka expected. Nonoha works to calm the children down whilst Kaito solves the puzzles. When the last puzzle gets destroyed due to falling debris, Nonoha's photographic memory allows her to recreate the puzzle, allowing Kaito, Gammon and the children to solve it, revealing a statue of Florence Nightingale which Nonoha donates to poor children. As a result, Nonoha ends up with the title 'Nightingale', which doesn't exactly please her.
Read More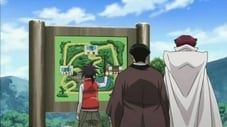
Crabs! Hot Springs! Puzzle Kings!
Kaito is contacted by Genius Okudera, a man he once saved from a ruin, who invites him, Nonoha and Ana to a puzzle-themed hotel resort in Hokkaido to solve an alleged Kenja Puzzle being displayed as the centerpiece. After spending a day of activities, Kaito starts to solve the puzzle the next day, becoming suspicious that there aren't any traps involved. As Kaito comes close to solving the puzzle, which he deduces to not be a Kenja Puzzle, he almost succumbs to sabotage but is saved by Nonoha and Ana. Upon solving the puzzle, they find the treasure is a view of nature which has become ruined because of construction of an amusement park. Having painted a picture of what the landscape originally looked like, Ana helps the hotel owner remember the times he spent with his grandfather who created the puzzle, deciding to cancel construction and work on rebuilding the forest.
Read More
The Fallen Apple and the Continuing Road
As Root Academy prepares for a cultural festival, where Kaito finds himself reluctantly entered into a crossdressing contest, the principal, Baron Kaidou, agrees to install a Kenja Puzzle within the academy. Just as Kaito gets into his crossdress, he learns that Nonoha has been taken hostage for the Kenja Puzzle, in which he must eat apples from truth telling dwarves whilst avoiding poisoned ones before the setting burns down. Kaito soon learns from the Giver that granted him Orpheus, who is secretly the student president, Souji Jikukawa, that important information needed to solve the puzzle has been intentionally left out. Souji provides the remaining information for the puzzle, allowing Kaito to solve it and free Nonoha, before getting help from Cubic to save them from the collapsing area.
Read More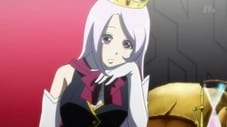
Welcome to the Queen's Country
As Kaito dreams of appearing on a TV puzzle show hosted by Elena "Antoinette" Himekawa, Gammon, who had been Elena, jumps in to protect her when it looks like she is being cornered, though she is not too happy about the rescue. As a POG Giver, Elena is asked by the headquarters president to bring Kaito, Gammon and Nonoha to a Kenja Puzzle. They are trapped in a puzzle suspended over a pit in which Kaito is given the option to sacrifice his friends to receive hints, while Gammon and Nonoha are given the option to either sacrifice themselves, or make Kaito fall instead. As Elena tempts the others to sacrifice Kaito, she is surprised about how much faith they have in Kaito. As Kaito struggles near the end, the Orpheus bangle kicks in and he manages to solve the puzzle just in time.
Read More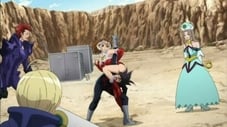
The Queen's Counterattack
Elena enlists the help of Kaito and his friends as extras in a new sentai show she is starring in. Later that night, Elena brings everyone together for a Kenja Puzzle in which they must construct a three-dimensional puzzle within a time limit or else be electrocuted. As Elena makes the puzzle harder by throwing in a remote controlled UFO in the works, the POG president sends in more explosive variants against Elena's wish. After everyone works together to stop the bombs and protect Elena, Kaito enters his Orpheus state and solves the puzzle in the last minute, revealing the treasure to be a puzzle book Elena had when she was younger. Meanwhile, the HQ President is relieved of his duty for his unfair ways.
Read More
Puzzle Time Reunion
Kaito is surprised to meet his childhood friend, Rook Banjou Crossfield, who unbeknownst to him is the head of POG Japan, and learns he is to become an exchange student at Crossfield Academy in England. Upon arriving at the academy, Kaito and Rook spend some time exploring and reminiscing about old times, particularly concerning an old man who taught them about puzzles. While exploring a maze from their childhood, they discover a curious path leading to a Kenja Puzzle. Kaito is trapped inside it and is forced to solve the puzzle while avoiding deadly saw blades. It is soon revealed that this is a more extreme Kenja Puzzle known as the Fool's Puzzle.
Read More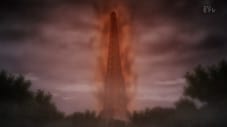
The Tower of Parting
As Kaito pushes through the puzzle, believing Rook is in danger, Nonoha and the others decide to fly to England, learning the truth about Fool's Puzzles from Souji on the way. As Kaito reunites with Rook, he tells him about their old master, Jin Makoto. As the puzzle room starts to fill with fire, Kaito's Orpheus state activates and he reaches the top, only to find there is no exit. It is then that Rook reveals he is a POG giver who created the puzzle and wanted Kaito to ascend to Phi Brain. As Kaito falls unconscious from the shock, Rook saves him from falling into the fire and leaves him for Nonoha to find.
Read More
True Worth of a Friend
As Kaito remains unconscious in hospital, Cubic is invited by Rook to take on a puzzle and accepts it, wanting to prove his friendship to Kaito. He comes to an abandoned military base where a different POG Giver gives Cubic a math puzzle to solve, where his failure will result in him being blown up by a tank. Meanwhile, Kaito regains consciousness and explains his situation with Rook to the others. Cubic is given the chance to escape, but he remains determined and manages to solve the puzzle at the last second. The Giver reveals that Rook made the puzzle when he was five, which makes Cubic feel unworthy of being Kaito's friend in comparison.
Read More
Blue Sun, Red Moon
Kaito becomes angry when he notices Rook to have done something to Cubic. He and Nonoha go to one of Rook's old living quarters, where they learn of Rook's disturbing childhood. After hearing from Nonoha about some ruins where Kaito and Rook used to hang out, Ana goes to investigate and encounters a POG Giver, who presents a maze-type Kenja Puzzle, which Ana solves easily. However, things get hectic when Gammon and Cubic attempt to rescue him, but Ana makes it out okay, retrieving a wooden puzzle Rook made for Kaito, the sight of which also surprises Rook himself.
Read More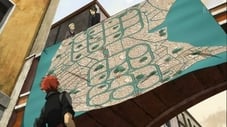
Exorcism Labyrinth
With the planes back to Japan allegedly taken over by the POG, Kaito and the others travel to Venice instead. As Souji goes to see Rook concerning the Phi Brain project, Gammon deduces that their transfer to Italy was the work of the POG and goes alone to take on a Fool's Puzzle, in which he must travel through numbered gates on a gondola. As Gammon reaches near the end of the puzzle, he finds the final gate difficult to reach and the rising tide putting him in danger. However, Kaito arrives and uses his Orpheus state to figure out how to reach the end of the puzzle safely, much to Gammon's annoyance.
Read More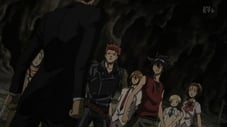
Truth
As Kaito and the others return to Japan, they find the principal, Baron Kaido, has gone missing. Later on, Kaito is summoned by the POG to the place where his parents died. As Kaito and the others arrive at the location and find Baron, Kaito receives a video revealing his parents were POG Givers monitoring his potential for Phi Brain. Baron further reveals that they weren't his real parents, as well as revealing himself to be a POG member. Baron decides to tell Kaito everything about the Phi Brain project, revealing that his parents went against the POG's orders and took the Fool's Puzzle that killed them in place of Kaito to protect him. Baron shows Kaito another video, showing that, despite not being his real parents, they truly loved him like their own child, which also shocks Rook. Determined to give his parents a proper farewell, Kaito activates his Orpheus state and solves the Fool's Puzzle once and for all. After telling Kaito that Jin is being held captive by the POG, he leaves and is captured by the POG for his betrayal.
Read More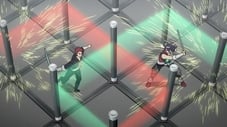
Resistance to the Light
Following the incident, Cubic and Ana start avoiding Kaito, believing they can no longer follow him, much to the dismay of Nonoha. Meanwhile, Gammon, who is contemplating whether he should become a Giver, becomes concerned that the POG may start targeting Nonoha. He calls Kaito and Nonoha out, saying that they should stay away from each other. When they object, Gammon challenges Kaito in a puzzle of his own design, in which they must attempt to trap each other in laser walls. After Kaito uses his Orpheus state to solve the puzzle, Gammon walks off and decides to become a POG Giver.
Read More
Illumination of Betrayal
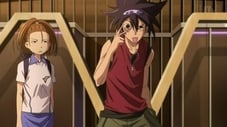
Kaito is visited by Gammon's little sister, Miharu, who is worried that she hasn't heard from Gammon. Meanwhile, Gammon arrives at the POG headquarters and is challenged by the Givers to earn the right to see Rook. He is eventually challenged by Rook's right hand man, Bishop, to face a puzzle in which he must manipulate lanes on a motorbike circuit to catch up to his opponent. Kaito and Nonoha are meanwhile approached by Elena, who tells them about Gammon joining the POG and gives Nonoha a puzzle which she solves herself. As Gammon clears the puzzle and earns the right to join Rook, Kaito experiences a strange reaction coming from the Orpheus bangle.
Read More
The Accelerating Challenger
As Miharu has dinner with Nonoha, Kaito faces a deadly puzzle against Gammon, who seeks something known as The God Scrolls in order to complete the Puzzle of God. As Kaito nears the end of the puzzle, he sees a vision in which his friends die, which causes him to hesitate and make an error, though Bishop arrives and ends the puzzle before Gammon can win. The next day, Kaito sees more of his vision, predicting the destruction of the world if the Puzzle of God is solved. Believing this to be a vision of the future, Kaito resolves to solve the Puzzle of God himself.
Read More
Shining Tears
As Kaito experiences strange occurrences in which he loses focus of everything else when he glances at puzzles, Cubic reveals this is the result of Kaito's brain speed reaching abnormal levels, advising him not to solve puzzles anymore. As Kaito ignores his advice and prepares to face another Fool's Puzzle, Cubic asks for Souji's help in hacking into POG's network. Although Kaito is able to quickly solve the puzzle, he remains unable to see anything, but Nonoha arrives and helps him return to normal. As Cubic and Souji successfully hack into the POG network, Baron follows Rook to where Jin is held captive, finding that Rook also has an Orpheus bangle.
Read More
The One to Carry on His Will
After finding Jin a complete wreck, Baron explains to Gammon about how POG's leader, Count Pythagoras, intends to bring about a conflict between Kaito and Rook in order to open the gate to the Puzzle of God, while Kaito reads up on what Cubic had found on POG's network. Years ago, Pythagoras once attempted to achieve Phi Brain using Jin, who contracted with Orpheus and became a solver for POG. However, one day, Jin received a vision of the future, showing the world being destroyed by Pythagoras. Jin quit POG while Baron stayed to become a Giver, working together to find a way to prevent Pythagoras from achieving the God Scrolls. Two years prior to the story, Jin left to fight against Pythagoras in the Puzzle of God, though the results are unknown. As Kaito and the other files discover a hidden file on the POG network reading 'Phythagoras is dead', Rook appears before them, revealing he has been the one in control of the POG since Pythagoras' death half a year ago. As Rook reveals himself to be an Orpheus contractor, Kaito's vision shows that the one supposedly responsible for destroying the world is himself.
Read More
The Choice Remaining
After Kaito's encounter with Rook, he goes to see Ana, whose drawings and paintings resemble his visions, explaining that the future is yet to be determined. The next day, Gammon challenges Kaito to a final puzzle in which they must climb up a series of platforms to win while avoiding being crushed by their opponent. As Kaito becomes conflicted on how to solve the puzzle without putting Gammon at risk, his Orpheus bangle breaks, retaining his brain power but remembering his ideals, allowing him to win the puzzle without killing Gammon. As Rook becomes shocked by the results, Kaito's vision changes accordingly.
Read More
Eternal Existence
As the POG breaks apart following Rook's outburst, Kaito is contacted by Rook, who asks to spend some time with him in a surprisingly friendly manner. After a seemingly normal day of hanging out together, Rook challenges Kaito to a fight to the death so that he can unlock the God Scrolls he has in his possession. As Kaito agrees to go with him to the island of Kaika in the hopes he can save him as well, Baron and Gammon retrieve Jin while Bishop asks the help of Nonoha, Cubic and Souji to try and stop them.
Read More
Let's Start the Puzzle Time !
Rook presents a solar system based puzzle where, if Kaito reaches the Sun, Rook would fall to his death, with Rook simplifying the puzzle to make it easy for Kaito to solve. Kaito, looking for a way to solve the puzzle while saving Rook, realizes he can get help from his friends. Realizing that the puzzle is based on the wooden puzzle Rook made him ages ago, Kaito manages to save Rook by stopping the Sun from crumbling while the others use a bomb to steer Kaito and Rook to safety. As Rook realizes he wants to make more puzzles for fun, his Orpheus bangle disappears, and he decides to go on a journey to find himself and reform the POG.
Read More
Orpheus Order
While solving another Fool's Puzzle, Kaito spots a curious person watching him. The next day, Kaito discovers the school has been converted into a Fool's Puzzle that wasn't arranged by the POG. Finding a strange mirror based "Judgment Puzzle", Kaito meets the person, who challenges him to escape the puzzle or else be killed. Meanwhile, student council member Tamaki Chieno, who has a crush on Souji, is approached by another strange man. As the curious person hints that he knows more about Kaito than he lets on, Kaito manages to solve the puzzle just in time to escape. The man introduces himself to be Freecell, a member of the Orpheus Order who possesses an Orpheus bangle, before Tamaki appears to challenge Kaito to a puzzle battle.
Read More
Darkness of the Heart
Tamaki, who was given a strange earring by one of the Orpheus Order's members, Pinochle, challenges Kaito to a Judgment Puzzle in which he must navigate an ever-changing maze. Nonoha deduces that Tamaki's change in personality is the result of her earring, which possesses the same properties as the Orpheus bangle. Tamaki uses the power of the earring to increase her brainpower, but Kaito manages to successfully solve the puzzle. As Kaito reaches Tamaki, her earring breaks, returning her to her senses while the Orpheus Order escapes.
Read More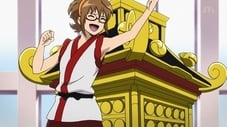
Licky-Licky's Trap
While at the arcade, clumsy Puzzle Club member Airi Mizutani is approached by a member of the Orpheus Order, Mizerka, who gives her an Orpheus Ring. After putting it on, Airi suddenly becomes more intelligent and less clumsy. She then lures Nonoha into a trap in order to challenge Kaito to a puzzle where he must solve a crane puzzle in a limited amount of moves in order to save Nonoha. What proves difficult is Airi's stubbornness, as she constantly resets the puzzle every time Kaito comes close to winning. Just then, Airi enters an Orpheus state and brings up a seemingly impossible puzzle before losing consciousness. However, Kaito manages to solve the puzzle, only to discover Nonoha wasn't in any danger at all, while the Orpheus Ring breaks and Airi returns to her normal self.
Read More
Night of the Knights
During the night, the members of the Orpheus Order meetup to receive a message from their leader, Klondike. Meanwhile, as Cubic deduces the recent Orpheus Rings are modernized replicas, Gammon discovers spots Miharu with an Orpheus Ring and confiscates it from her, along with a note directing Kaito and co to a stadium. There, they find the Orpheus Order, who reveal they are using the replicas to collect date for building an authentic ring so they can distribute it across the globe. The Order's secretary, Hoist, then pits Kaito, Gammon, Cubic and Ana in a puzzle match against the Order's Pinochle, Mizerka, Doubt and Melancholy, revealed to all possess authentic Orpheus Bangles, with the losing team becoming electrocuted. In a puzzle to gain the most colored squares, Kaito manages to set things up for Gammon to bring things to a tie so no one gets electrocuted.
Read More
Wandering Galileo
Gammon's frustration concerning the Orpheus Order's attempt to target Miharu leads to a slump in the puzzles he makes under his pen name, Setsu Chidou. When he returns home that night, he finds Doubt waiting for him, offering him the chance to join the Orpheus Order. The next day, Gammon asks the POG for assistance and meets up with Elena, who becomes concerned about Gammon's desire to ditch puzzles in favour of revenge. The next day, out of the blue, Kaito challenges Gammon to solve the puzzles he has made, based on the ones Gammon made the first time they met. As he solves them, he remembers his love for puzzles. Afterwards, Gammon sends a letter to Doubt rejecting his offer before vowing to make better puzzles than before, while FreeCell prepares to make a move on Root Academy.
Read More
The Battle is the Puzzle's Melody
The Orpheus Order show up at Root Academy, revealing themselves to be students of Crossfield Academy, and challenge Kaito and the others to a duel in which, if they win, they will take possession of Kaito. They are brought to their hidden base where they must participate in a team sliding puzzle. Cubic loses the first round against Melancholy, but manages to gather some data to send to Souji. As Kaito prepares for the next round, FreeCell shows off a pendant that Kaito supposedly made a promise on.
Read More
The Promise
Kaito begins his match against Pinochle, who is able to predict Kaito's moves having studies his data, though Kaito manages to turn that aspect against him. Just then, Pinochle begins revealing things about his past at Crossfield Academy, reminding him of a promise he made with Freecell that he broke while searching for Rook that day, which supposedly led to the death of Freecell's mother. With his determination wavered, Kaito ends up losing the match to Pinochle.
Read More
I Want to Give You Happy-Smiley
As Kaito has some alone time following his match, where he recalls more about his past, Ana talks with Nonoha about his sister, Eve, who helped cheer him up when he was down. As the game resumes, with another loss resulting in a team loss, Ana faces off against Mizerka. As Mizerka becomes annoyed by how much of a free spirit Ana is, Nonoha shows Kaito a chalk drawing Ana drew, based on a painting Eve did for him. Firm in his belief in Kaito, Ana manages to win his round. Afterwards, Kaito gives his thanks to Ana, who suggests he try and do the same thing for Freecell.
Read More
The Truth Behind the Smile
As Freecell refuses to tell Kaito the truth about what happened to his mother, Gammon gets Hoist to combine the remaining two matches into a tag-team duel with Kaito and Gammon against Freecell and Doubt. As Kaito continues to struggle throughout the game, Freecell continues to torment him. Just then, Cubic receives the date he had Souji analyse, revealing that Freecell and the others had been consumed by the Orpheus rings, which are controlling their emotions just like Rook was. As Nonoha reminds him of his promise to solve all puzzles, Kaito regains his senses and works with Gammon to win the game.
Read More
Puzzle Time Won't Begin
Following the battle against Orpheus Order, Elena transfers into Root Academy and takes the Phi Brain kids and their friends on a vacation on her private island, where puzzling is forbidden. However, Kaito and the others have trouble relaxing due to the lack of puzzles. They soon get excited when they find a clue to what is supposedly a puzzle and go into a cave to search for it, not willing to listen to Elena's explanation. In the end, it is revealed to be the set of a monster movie the POG made which almost made them bankrupt and was kept a secret. Realising there's no stopping them, Elena turns the vacation into a Puzzle Camp, much to the annoyance of Nonoha.
Read More
Even Nonoha Wants to Solve Them
With the vacation now fully puzzle focused, Nonoha feels like she has nothing to do. Wanting to spend more time with everyone, Nonoha decides to join in Elena's intense puzzle training. Although she sucks at the physical puzzle, she shows talent in solving digital versions of the Kenja Puzzles they faced before thanks to her photographic memory. After feeling a bit more left out, Nonoha becomes determined to solve a puzzle she received from Kaito when she was little before the camp ends. As she focuses on the puzzle, the others seem to get a little less enthusiastic. On the last day of the camp, Airi and Miharu come to Nonoha for help with preparing breakfast. Afterwards, Nonoha realises she still has a place to belong to even without puzzles.
Read More
Minotaur's Lure
As Rook and Bishop investigate the Orpheus Order elsewhere, Souji expresses his desire to quit both the student council and the puzzle club. Meanwhile, Souji is contacted by Minotaur, who is revealed to be working for the Orpheus Order and tries to tempt him with a replica ring, though he still refuses. The next day, Naoki Takeda decides to run for student council president, prompting Tamaki to run against him. Later that day, Souji receives an invitation from Minotaur to come to the place where Kaito found the Orpheus Bangle, challenging him to a Fool's Puzzle which would destroy the academy should be lose, presenting him with a replica ring so he can solve it. As the others get word of this, Cubic reveals what Souji told him about willingly becoming a labrat for the replica rings. As they arrive on the scene, they find that Souji had solved the puzzle using the replica ring and challenges Kaito.
Read More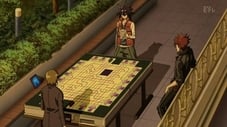
Forbidden Fruit
Souji sets up a sliding puzzle for Kaito, also threatening to blow up the academy should he fail. As Cubic, defiant that Souji hasn't changed, goes to search for said bomb to prove his theory, Nonoha and Ana end up helping Tamaki with her paperwork in order to get her to evacuate. As the game progresses, Souji soon feels the advantage of the replica ring and starts to enjoy it. However, Kaito soon expresses his joy at such a fun puzzle and turns it around for the win, which leads to the replica ring being destroyed. Afterwards, Souji explains what he had learnt from wearing the ring, deducing the rings will destroy themselves if their user feels they have lost. The next day, Tamaki is voted student council president whilst Souji goes on a journey, leaving Kaito with another truth he discovered about the rings; their desire to join with him and become true Orpheus Bangles.
Read More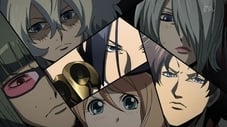
The Devil Has Returned
Elena is told off by Tamaki after makes various 'improvements' to the school without permission. Meanwhile, former POG member Herbert Muller appears before the Orpheus Order, beating Doubt in a puzzle and revealing he has a genuine Orpheus Bangle. As Hoist decides to tell Freecell the intentions of their leader, Klondike, Herbert kidnaps Elena to lure Kaito and Nonoha to a film studio, where they must both battle against two Orpheus Order members, Wu and Noh, in order to rescue Elena. As Nonoha struggles to keep up, Rook shows up to take her place, along with Bishop who rescues Elena, allowing Kaito and Rook to beat the puzzle.
Read More
Atonement
As Melancholy takes interest in a girl named Lotte and her intelligent dog named Rummy, Rook shows Kaito and the gang a newer Replica Ring model recovered from a manufacturing plant for Cubic to analyze. Melancholy equips Lotte and Rummy with Replica Rings and uses them to confront Rook in a puzzle, in which they must navigate a fog filled maze over a deadly drop, with the loser falling to his death. As Rook manages to learn the trick to solving the maze, Rummy struggles under the command of Lotte, whose personality is manipulated by the Replica Ring. As Rummy stops, Rook reminds Lotte that it's not the mazes Rummy liked, but her. As Herbert decides to set the maze to automatically collapse, Rook manages to reach the center in time to save both Lotte and Rummy. The next day, Rook returns to the POG to help stop the Orpheus Order from claiming more victims.
Read More
The Pieces of Hatred
Ana is visited by his older sister, Eve, who is soon revealed to possess an Orpheus Bracelet, showing a drastic change from the kind-hearted personality that Ana admired and blaming him for having to give up her dream as a painter. Working with Mizerka, she challenges to Kaito to game where, should he lose, Mizerka would break Ana's arm and end his dream as a painter. Kaito is tasked with completing a large picture puzzle in fifteen minutes. As Eve laments how she suffered due to Ana overtaking her in artistic talent, Kaito manages to complete the puzzle, revealing a painting of suffering that Eve drew. After Kaito explains how neither the puzzle or the painting represents the true Eve, Mizerka attempts to attack Ana but Eve stops her and her bracelet, which turns out to be a Replica Ring, collapses. As Mizerka contemplates how Eve was used an experiment, Eve goes under the protection of the POG, although Ana feels she is lying when she says she'll take up painting again.
Read More
Pinochle's Resolve
Pinochle challenges Kaito to a puzzle, saying he will tell him everything about what happened between him and Freecell should he win. However, the loser will fall into a furnace. As Pinochle tells of how Kaito was supposedly a liar, Kaito simply states he wants to know the truth so he can properly apologise for what he may have done and soon makes a comeback. As they reach the top, Kaito refuses to finish Pinochle off, as hurting someone for the sake of a friend is not something that friend would appreciate. As Whist sabotages the puzzle to try and make Pinochle fall, Kaito manages to use his smarts to rescue him. As Pinochle realises what he wants is to become true friends with Freecell, his Orpheus Ring breaks, revealed to be another Replica Ring. As Freecell and Whist tell the others that Pinochle died, Pinochle reveals that he spread bad rumors so that Freecell wouldn't become friends with Kaito and abanadon him, with Cubic deducing that the Ring caused him to believe in his own memory that Kaito did it. As Pinochle mentions he doesn't know the connection between Kaito's promise and the death of Freecell's mother, Kaito decides to become friends with him.
Read More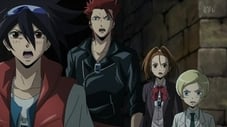
Because That Man is Herbert
After finding out the location of Orpheus Order's hideout from Pinochle, Kaito and the gang head there, where they are confronted by Herbert, who is wearing two rings. He challenges Kaito to puzzle in which he must use a boat to ferry everyone across to the other side whilst taking into consideration roles they have been given, with Kaito requesting to meet with Freecell should he win. Things get a little complicated when two necessary keys are thrown into the mix. Despite some last minute interference by Herbert, Kaito manages to solve the puzzle. As Kaito commends Herbert on his puzzle, he becomes possessed by the rings and activates a bomb against his will, causing the puzzle room to collapse with Kaito and Herbert inside it.
Read More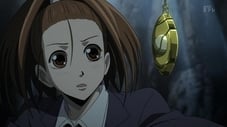
The Awakening
As Cubic works to help Gammon and Ana, Nonoha goes in search of Kaito and comes across Freecell. After some reluctance, Nonoha accepts Freecell's help in solving the puzzle blocking their way to where Kaito is, being given a memento from his mother as payment. As Freecell tells Nonoha about how he feels Kaito's broken promise is related to his mother's death, his Orpheus Bangle glows a mysterious color and his memory is rewritten, leading him to now believe his mother's death wasn't Kaito's fault, but his own. As the cave soon begins to collapse, Freecell uses the power of his bangle to solve the puzzle. After managing to find Kaito and Herbert and getting them to safety, Freecell reveals the Replica Ring he had been wearing had evolved into a true Orpheus Bangle, challenging Kaito to a game when he is ready.
Read More
The Puzzle of Fools, Once Again
As the gang try to figure out more behind Klondike and the Replica Rings, Cubic reveals to Gammon that Kaito's brain patterns are still accelerating even without the Orpheus Bangle. Meanwhile Kaito, who had a vision involving Freecell and Nonoha, is approached by Whist, who reveals all the rings the Orpheus Order wears are replicas, but Freecell had managed to use it to awaken as a Phi Brain child. Realising he needs to become stronger, Kaito asks Rook to take him to a Fool's Puzzle. Kaito is soon brought to a maze where he must carefully avoid statues which trigger trapdoors. Managing to reach the end of the puzzle safely, Kaito discovers that Freecell had managed to solve it first. As Rook decides to help Kaito train against harder puzzles, Freecell meets up with Whist, revealing what he now knows thanks to the Ring.
Read More
The Sad Clown
Mizerka and Doubt are sent a password to access their confidential files, where they learn the truth about their rings. As Mizerka learns Melancholyhad been playing along with her the entire time, she and Doubt get their rings upgraded by Doubt and go to challenge Kaito and Ana to a final puzzle. Baron agrees to the challenge and has Gammon construct a collapsing construction site puzzle to battle on. As the puzzle goes on, everyone takes after Ana's example and enjoy the puzzle. As Kaito gets into a winning position, Mizerka expresses her desire to live, and both her and Doubt's rings break, although they are both rescued. Afterwards, Pinocle reveals he was the one who sent Mizerka the password so they could be saved. Meanwhile, Freecell meets up with Orpheus Order's leader, Klondike.
Read More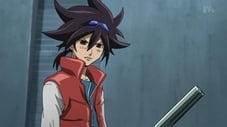
The Dominator Atop the Board
Melancholy and Whist appear at the POG headquarters to deliver a message from Klondike challenging Kaito to a puzzle, revealing he has Freecell in his possession. As Kaito and Klondike prepare themselves for the puzzle, in which they must design a maze for their opponent and be the first to solve their opponent's maze, Klondike reveals all of his experiments were to create a Final Ring for himself. As Kaito struggles against Klondike's maze, Melancholy reveals her ring is a genuine Orpheus Bangle. As Kaito figures out the nature of Klondike's maze, Klondike activates his Final Ring, absorbing Kaito's brainwaves to complete it.
Read More
God's Miscalculation
Souji returns having been to Crossfield Academy where he retrieved a diary from someone who used to be in the Orpheus Order. It details how the Orpheus Order was changed when Klondike decided to have the Orpheus Ring examined in order to make replicas. The first prototype ring was worn by the diary's owner, a woman named Solitia, who is revealed to be Freecell's mother. Believing the rings to be dangerous, Solitia fled the Orpheus Order with Freecell, chronicalling the effects the ring had on her in her diary, which she was unable to give to Freecell before she passed away. As Kaito becomes determined to rescue Freecell from his fate, the POG and ex-Orpheus Order members instigate a plan to stop Klondike and destroy the Final Ring. Hacking the elevators, the POG manage to bring Klondike, Whist and Melancholy to a dead end, where they are confronted by Doubt and Pinochle. However, Klondike manages to foresee this and escape to the roof where Freecell awaits, demonstrating a power that frightens Melancholy to the point of her Orpheus Ring breaking. After Freecell manages to overwhelm Klondike somehow, he heads off on a helicopter, leaving a message to Kaito to meet him at the location of God's Puzzle.
Read More
The Closed-Off World
As Freecell becomes curious as to why Nonoha is present in a vision of him facing off against Kaito, Kaito and the others ponder why Freecell needed Klondike's Final Ring. The next day, Hoist abducts Nonoha, taking her to Freecell's location in the Himalayas. As Kaito and the others head to their location, Freecell explains how the memento he received from Solitia was a puzzle he wanted to solve with Kite. Nonoha then proceeds to tell him the truth about what happened to Solitia. She also manages to replicate a puzzle Solitia made containing a secret answer showing Solitia's earnest feelings for Freecell, who then starts envisioning Nonoha as his own mother. Meanwhile, Kaito and the others are greeted by Hoist, who wants to create a successor that can surpass God.
Read More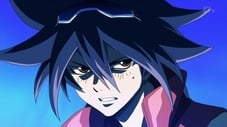
Release the Infinite Puzzle!
Kaito and Freecell begin the puzzle in which Kaito must use clues to chase down Freecell. As they constantly try to outwit each other, their brain levels increase and they soon start running in circles without end. As they both start to reach their limits, Nonoha calls out to Kaito and snaps him out of it, allowing him to end the eternal loop and solve the puzzle. Despite the puzzle being solved, Freecell remains soulless as his ring is still active. Remembering Freecell's original promise with him, Nonoha gets Kaito to help Freecell finally solve his mother's pendant, allowing him to break free of the ring and return to normal. As Freecell and the others return to Crossfield Academy, Kaito and the gang resume their duty of releasing the Fool's Puzzles.
Read More
Rätsel...
Whilst exploring a Sage's Puzzle in England with Jin in the hopes of recovering his memory, Kaito stumbles upon an unsolved puzzle, having assumed Jin had already solved all of them. Solving the puzzle with ease, Kaito discovers a brooch with a cat engraved on it, which Jin takes an interest in. Later, they, along with Nonoha and Rook, go to the Fool's Puzzle where Kaito and Rook previously faced off against each other, where they encounter a strange girl named Raetsel, who takes the brooch and runs off with Jin inside the puzzle, activating its traps. Back in Japan, a man named Johan Seigmund Enigma appears before the other Phi Brain children, attaching an explosive puzzle on Cubic's back, stating his intent to annihilate all puzzlers, claiming it to be Jin's desire. After the bomb is disarmed, Enigma leaves whilst his accomplace, Whodunnit, challenges the others to a puzzle. Meanwhile, Kaito's group arrive at a room with many doors, with Raetsel tasking them with finding the correct door before the ceiling collapses, claiming that Jin hated puzzles.
Read More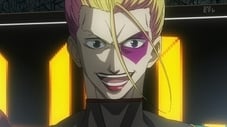
You Know Nothing
Thanks to Kaito's deductions and Nonoha's memory, their group manages to find the correct exit and escape. Afterwards, Raetsel takes everyone to her personal boat, where she shows them a feed of Gammon's group as they face Whodunnit's puzzle, where they must arrange cubes successfully or else be electrocuted. Working together, they deduce the colors of the cube are a clue to numbers in a magic square puzzle, managing to solve it with a second to spare. Although Raetsel leaves Jin with Kaito and the others, they are left uncertain by how the Master Brains, who target puzzlers for bounty rewards, claim to be contracted by Jin.
Read More
Even So, I'll Believe
As Raetsel transfers into Root Academy, Gammon spots Jin behaving rather oddly, uncertain whether or not to believe either Kaito or Ratesel. Later, a Master Brain posing as Jin appears before Kaito, challenging him to a Fool's Puzzle in which he much navigate a sliding puzzle maze within a time limit or else fall to his death. As Kaito comes close to solving it, the fake Jin blows out one of the rooms, preventing him from reaching the exit, as well as tilting the maze. However, Kaito manages to take advantage of risky nature and reach the maze's goal in time.
Read More
Eating Delicious Things is an Alternate Method for Solving Puzzles
Whilst Kaito is having a picnic with Jin and Nonoha, Raetsel appears before Kaito, stating that the Fools' Puzzles made Jin suffer, clashing with Kaito's own memories of him. However, Nonoha helps them realise there are some memories of Jin that they both share. Meanwhile, a Master Brain named Dr. Theorem appears before Cubic, who decides to face him in a puzzle to prevent him from reaching Kaito. Cubic is tasked with finding 'the most beautiful number' within 15 minutes before he is engulfed in flames. After Kaito learns of Cubic's predicament, he rushes to his aid and helps him find the solution; the golden ratio. After the battle, however, Jin starts experiencing pains in his head.
Read More
I Just Get That Feeling
Rook calls Kaito and Raetsel together, telling them about a time he had a talk with Jin, who told him a cryptic message about puzzles being both 'chains' and 'mirrors', which he had also told Raetsel. He goes on to explain his research on Jin's year spent with Raetsel, showing that even though he fought against Fool's Puzzles, he also taught others the fun of puzzles. Wanting to prove her own case, Raetsel takes Kaito and Rook to a Fool's Puzzle that Jin wasn't able to solve, consisting of various elevators above a bottomless pit. Seeking an answer to Jin's riddle, Rook takes on the puzzle, in which he must navigate the elevators based on their assigned numbers or else be crushed. With encouragement from Kaito to listen to puzzle's voice, Rook manages to reach the goal. Rook states he was able to solve the puzzle thanks to a clue allegedly left behind by Jin, who apparently lied to Raetsel about not completing it to keep her safe. Rook then states his answer to Jin's riddles, that puzzles are both chains that link people together and mirrors that reflect the solver's emotions.
Read More
Rae-Rae is a Cat-Friend
Elena, who had just come back from abroad, becomes curious about Raetsel and decides to hold a welcoming party for her to find out more about her. This attracts the interest of Ana, Airi and Tamaki, who all invite Elena to hang out with them, hitting the shops before going to a pool. Meanwhile, Gammon, who becomes irritated that his bounty is lower than the others, is called out by a Master Brain named Colonel Demolitionman, who traps Elena's group, along with Kaito and the others, inside the pool building. This puts pressure on Gammon, who has to solve a set of puzzles from inside a tank before it smashes into the building with everyone inside it. Despite facing up against great odds, Gammon's determination to not lose lets him solve the puzzle and stop the tank in time. Afterwards, Raetsel confronts Enigma, who put her at risk as a reminder of her mission. As Raetsel chooses to break her new ties of friendship and go back to her old self, Melancholy is seen with Raetsel's group.
Read More
Would You Like Some Flowers Too?
Rook informs Kaito that Jin had previously made some Fool's Puzzles, which he himself destroyed as a means to improve his Giver skills, theorising that he may have been under influence from the Orpheus Bracelet. Kaito, refusing to acknowledge this, shows Jin a warm puzzle he once showed him during his childhood. Meanwhile, Freecell falls into a trap laid out by Melancholy, who has joined the Master Brains in order to get revenge on him, trapping him in an underground maze. Learning of Freecell's predicament from Pinochle, Kaito, Nonoha, and Gammon fly to England to search for him, finding him at an old train yard, where Melancholy challenges Kaito, Gammon and Freecell to a Fool's Puzzle, in which they must connect with their partners whilst sacrificing the other players. Contrary to her expectations, however, Melancholy is chosen as the fourth player in the game by Enigma, who had caught onto her intention to try and save the others and also claims it to be a puzzle built by Jin. As Gammon notices a message laid out by Kaito, both Freecell and Melancholy struggle with theirs.
Read More
Farewell Forever
Freecell and Melancholy soon come to understand Kaito's message, allowing the four of them to reach a solution that allows everyone to escape alive. Afterwards, Melancholy invites everyone to her mansion for dinner, where she lives alone with her maid and butler. Later that night, Kaito and the others come across a room filled with puzzles Melancholy made for her Master Brain training, which helps Freecell rekindles his love of puzzles. Still holding onto her hatred, Melancholy burns all of her puzzles. The next day, however, the others come across her feeling remorse, realizing she made puzzles because she was lonely, and ask to become her friends, to which she stubbornly declines. Not wanting to give up, Freecell asks Kaito to design a crossword puzzle for her to solve after they leave, saying they will meet again. Meanwhile, Raetsel suspects something is up with Enigma.
Read More
Let's Go, To That Place
Baron, Souji, Rook, Bishop, Raetsel, and Jin are all called up to meet up with Enigma to discuss Jin. Enigma talks about how Jin first met Raetsel, noticing her skills in crafting puzzles, and took her on his journey to protect her from organizations like the POG. When Raetsel discovered Jin was going up against Fools' Puzzles, she believed he was suffering alone and resolved to help him. Eventually Jin left Raetsel to go up against Count Pythagaras, where he lost his memories. Enigma claims that Jin told him to assemble Master Brains and annihilate all puzzlers should something happen to him, though Souji remains suspicious about whether Enigma has his own agenda against puzzles. Meanwhile, Raetsel states Jin told her she could abandon puzzles should she choose, which Jin does recall saying. Afterwards, Rook and Souji believe there may be clues in God's Puzzle and God's Scripture on how to restore Jin's memories. Meanwhile, Baron questions Jin on what he told Raetsel, since it contradicted what he once said to Kaito, which Jin suspects may pertain to something Kaito has that Raetsel doesn't. Raetsel, who had overheard them, remains in denial and takes Jin for herself, challenging Kaito to try and find them.
Read More
What Is Your Real Dream?
Following a hint Raetsel left them, Kaito, Nonoha and Gammon travel to Texas, where they meet a girl named Nono and her brother, Joe, who is a skilled basketball player. Nono explains that Joe was scouted for a pro team, but when their parents died, he quit basketball to take over his father's job, which is revealed to be as a Master Brain. Joe challenges Gammon to a Fool's Puzzle, in which they must race against each other through a maze left behind by his father, using bikes that have had their brakes cut. Despite being cut off from the latter half of the maze, Gammon manages to use the maze's walls to get ahead of Joe and win the race. Afterwards, Gammon reminds Joe to follow his true dream and take up basketball again, whilst Kaito finds a clue in the maze's center directing them to their next location.
Read More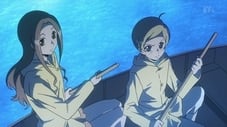
Just Now, I Was Thinking of Someone
With Kaito's group stuck between flights, Cubic and Ana go ahead of them to Rio de Janeiro, where they meet a woman named Regina Maria Vasco. Taking them to a hidden cave under the pretense of helping them find Raetsel, Regina reveals herself to be a Master Brain and traps Cubic and Ana in a Fools' Puzzle, in which they must travel via canoe across several containers whilst making sure they end up with equal volumes. Cubic makes some progress with his calculations thanks to Ana, but Regina keeps interfering with their progress. Luckily, Cubic's robot, Iwashimizu, arrives and uses a stalactite to bring the water up to the right level, solving the puzzle and earning their next clue. As Kaito's group finally arrive only for the puzzle to be already solved, Herbert is seen talking to Enigma.
Read More
Is That What You Thought I’d Say?
After discovering some puzzles in South America, along with a ring left behind by Raetsel, Kaito's group soon come up against Herbert, who has equipped himself with four replica rings. He challenges the group to use their own weight to determine a balancing puzzle. After some initial confusion, Kaito manages to figure out the puzzle's hidden gimmick and solve it. As Kaito urges Herbert to throw away the rings, Herbert finds himself at odds with his own conscience, eventually finding the power within himself to break free of the rings. After Herbert inadvertently sets his own trap on himself, the group head towards the Andes.
Read More
She's Too Shallow
Feeling that she somehow needs to prove herself to Jin, Raetsel decides to confront Kaito herself, challenging them to find Jin inside a Mayan pyramid. Meanwhile, Rook and FreeCell arrive at an Egyptian pyramid where the Pythagoras Scriptures are believed to be hidden. As Kaito travels through Raetsel's puzzle, he feels that it is shallow and half-hearted. Upon reaching the maze's center, Raetsel questions if Kaito will be able to accept whatever truth lies before him, Kaito echoes what Jin taught him about not running away from the truth. However, the Jin at the center of the maze turns out to be the impostor Jin from before, with Raetsel trapping Kaito and the others inside the maze, holding them as the prize for Rook and FreeCell's puzzle.
Read More
If It Were the Us From Then
Rook and FreeCell is tasked with helping each other get through the pyramid's maze using hieroglyphic gateways within ten minutes before they are locked inside forever. Whilst they quickly figure out the relationships of which gates open up with other, they soon find themselves at a dead end. Freecell suggests that they stop thinking like Solvers and instead think like Givers, deducing what methods Raetsel would use to keep them trapped inside, discovering the puzzle's weakness and arriving at the center of the maze in time. As Enigma sets the two pyramids to self-destruct, Rook and Kaito discover switches in both pyramids which reveal the Pythagoras Scriptures, before they escape safely. Meanwhile, Enigma forces Raetsel and Jin to flee from their hideout, hoping to push her into a corner.
Read More
For a World Where No One is Hungry
While the Baron is revealing Jin's past and his ties to the fallen puzzler Lavoushka. Enigma shows up and reveals his past and his motives for having the puzzlers eliminated
Read More
The Journey is Over
Kaito and the others arrive at Raetsel and Jin's location, where Kaito and Nonoha decide to speak with Raetsel privately, telling her what they learned from Enigma. Raetsel states she had apparently figured everything out herself, telling Kaito that Jin's memories will return if they face off against each other by a 'Killing Colloseum' puzzle that he and Raetsel made together. The puzzle soon begins, in which they must try and reach an exit before their opponent whilst avoiding deadly boulders. Although Kaito tries to get the puzzle to end in a draw so they can both escape safely, Enigma suddenly appears and brings Jin to the center of the puzzle. As Kaito and Raetsel rush to his aid, Jin regains his memories, allowing him to lead the two safely out of the puzzle via an escape route he had built. However, upon exiting the puzzle, they discover that Jin has been possessed by someone calling himself the Phi Brain, Orpheus.
Read More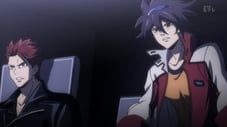
Become a Phi Brain
After Kaito, along with Raetsel, Rook, and Freecell, once again sees the vision of a ruined future, Orpheus demonstrates some of his power on Kaito, temporarily showing him an illusion where he failed to rescue Raetsel from the puzzle. Tempting him with the possibility of bringing Lovushka back to life, Orpheus gets Enigma to join his side and the two escape. The next day, Rook and Freecell explain their findings, explaining Orpheus transferred his mind into Jin's body during his battle with Pythagoras, and the scriptures were just a lure to bring people to the Puzzle of God. It is then revealed that Jin himself locked away his own memories in order to suppress Orpheus, and the power Orpheus used on Kaito was an incomplete ability to alter time. Just then, they receive a call from Raetsel, who had decided to join Orpheus as well, saying the only way to save Jin's mind is if either she, Kaito, Gammon, Rook, or Freecell awaken as a Phi Brain and offer their mind to him. As Kaito becomes angered by Rook's suggestion to either find an alternative way of saving Jin, or else kill him to protect the world, Freecell suggests to Kaito that if he can become a Phi Brain before Orpheus, he may able to save the future. Accepting this channel, Kaito heads off with Freecell and Nonoha to Amigne, where Orpheus awaits. Upon arriving, they are shown a vision of Kaito and Nonoha's childhood.
Read More
I Don't Have To Solve Puzzles
Orpheus appears before Kaito and the others, showing each of them alternate versions of their past, including Kaito managing to save his parents and Freecell's mother never having the Orpheus Ring. He then shows a genuine look at Nonoha's past where, even though a fit of binge eating left Nonoha unable to solve puzzles anymore, she still felt joy in seeing Kaito solve puzzles. Orpheus then reveals he made the bracelets to determine worthy vessels for his power, tempting Kaito and Freecell with the offer of becoming Phi Brains so they can change the past, in exchange for Jin's safe return. However, Nonoha knocks some sense into them, reminding them that both the good and the bad things of the past are what made them who they are today, letting them turn down Orpheus' offer and return to reality. Meanwhile, Jin regains temporary use of his body due to Orpheus stressing too much of his power, telling Raetsel he intends to let Orpheus die with him. As Gammon and Elena head towards Amigne themselves, Kaito and the others arrive at Orpheus' puzzle.
Read More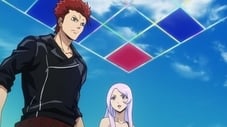
Because You Were Watching
Whilst Kaito's group tackles the puzzle before them, Gammon and Elena meet up with Raetsel in Amigne, eventually coming face to face with Orpheus, who brings them to an illusionary Sage Puzzle with an Orpheus Bracelet up for grabs. Tasked with navigating a sliding puzzle within a time limit, they soon hit a snag when some red panels thought to take them upwards through the maze take them down instead. However, Gammon eventually manages to find the puzzle's secret and reach the goal in time. Returning to the real world, Gammon finds he is now wearing an Orpheus Bracelet, but manages to resist its power and break it with his sheer stubbornness to be better than Kaito. Later that night, as Gammon gives his thanks to Elena for her help, he sees a vision of the future.
Read More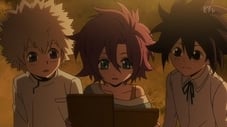
Cheers to the 100-Starred Jin
Told by Orpheus that she won't be able to become a Phi-Brain as she is, Raetsel agrees to take on a Sage Puzzle in order to obtain an Orpheus Bracelet. Despite Jin's objections, Raetsel enters Orpheus' world to a maze, in which she is only allowed to climb downstairs. During the puzzle, Raetsel sees visions of her past with Jin, desiring the power to change the past so she can stop him from facing up against Pythagoras. Some time later, Raetsel, along with Kaito and Rook, see another memory in which all three of them spent time with Jin, which Rook believes isn't simply an illusion. After figuring out the puzzle's trick, Raetsel solves it and earns an Orpheus Bracelet.
Read More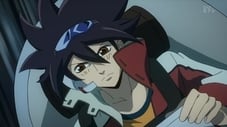
Kaito, You Lose
As Souji, Cubic and Ana meet up with the Orpheus Order to learn what they can about Orpheus, Rook, who has received an Orpheus Bracelet from Orpheus, challenges Kaito to a puzzle in which they must race against each other in roller coasters. Rook reveals that Orpheus' ideal is to surpass the gods, stating that he has seen the future that Kaito will fail the puzzle. However, Kaito's determination to save both of them proves Orpheus' future to be false, shattering Rook's resolve. Near the end of the puzzle, though, Rook reveals that the track is designed so only one can escape safely, sacrificing himself to let Kaito escape. This leaves Kaito more determined than ever to become a Phi Brain and defeat Orpheus.
Read More
That's Why You Mustn't Hesitate
Called together on a yacht by Enigma, Kaito, Gammon, Freecell, and Raetsel participate into a block-pusing maze puzzle to decide which two shall take on the Puzzle of God. Raetsel is the first to reach the center of the maze and escape after outwitting Freecell, with the remaining players now having to face explosive walls. Kaito and Gammon also manage to open the way to the exit, but Gammon becomes trapped under some rubble, with both Gammon and Freecell urging Kaito to not hesitate and escape on the last escape pod as Enigma sets the yacht to explode.
Read More
The Two of Us
After Orpheus informs Kaito and Raetsel that they'll be facing the Puzzle of God the next day, Kaito tells Raetsel not to come as he doesn't want anymore casualties. As Kaito shuts himself away whilst the others arrive in Amigne, Baron assures them that Gammon and Freecell made it out of the yacht okay, though he later tells Souji that this is just a lie to keep them from stopping Kaito from solving puzzles. Later that night, Raetsel takes Kaito to a festival, helping to realise the reason what he is fighting for and return to his energetic self. With the two deciding to challenge the Puzzle of God, Kaito and Raetsel return to the others, where Raetsel is invited to spend time with the other girls. As Raetsel feels thankful for the night of fun she had, she manages to break her Orpheus Bracelet. The next day, Kaito and Raetsel arrive at the Puzzle of God, a giant territory based puzzle game that is linked to their very past.
Read More
Even If Something's Missing
As Kaito and Raetsel are shown their pasts, which change based on their hearts' desires, they overlap, showing a vision of Kaito joining Jin and Raetsel on their journey. Upon reaching a point where Jin chooses to leave Raetsel behind and take Kaito with him, Raetsel feels dissatisfied and attempts to change the result, repeating the same loop over upon Jin telling her she is 'missing something', until she chooses to reject the memory altogether and end up in a fabricated world where she never met Jin. In this world, she comes across a brooding Kaito and takes an interest in puzzles, until he one day goes missing. After learning from an encounter with Ana that everyone is 'missing something' in some way, she comes to realise that even if she is lacking something, she is still able to have fun, managing to break free from the fake world and rejoins Kaito. Kaito explains he was able to find Raetsel by taking a path he would never take in the real world, a world where he never went with Jin and learned to love puzzles, where he grew to understand Raetsel's feelings. Just then, Orpheus decides to stir things up, separating Kaito and Raetsel.
Read More
It's Insanely Fun To Be Alive
As Raetsel challenges Kaito to face her in the Puzzle of God before Jin and Pythagoras, they are greeted by Nonoha who, in this timeline, had grew into a POG Solver. Her feelings that puzzles are solved with the feelings of others break through to Raetsel, bringing her and Kaito back to reality, where they continue the puzzle. Kaito uses his skill to allow Raetsel to win the puzzle, and they are both brought to the top of the tower, where Orpheus attempts to possess Kaito. However, Rook, who had faked his own death, uses Cubic's system to prevent Orpheus from taking over Kaito's mind, whilst Kaito reveals Orpheus and Jin had already merged together. After coming to understand that the thing Kaito had what he and Raetsel lacked was the ability to have fun with puzzles, Jin gives his final wishes to Kaito before passing away. Some time later, as everyone graduates from Root Academy, Nonoha manages to solve the puzzle Jin left behind and heads off in search of Kaito, who is out helping kids enjoy puzzles.
Read More