
Box 12 - Thriller Bark - Teil 2 - Sabaody Archipel - Teil 1 (German DVD Release)
32 Episodes
German Kaze/Crunchyroll DVD/Bluray Release Order

Beating Absalom when he refused to reveal he has been using firearms, Sanji reveals that he knows Absalom's invisibility is due to the Clear-Clear Fruit which he wanted for his own reasons. As Sanji defeats Abalsom, Luffy managed to get through Doppleman to land a hit on Gecko Moria with his Gum Gum Stamp. At the same time, losing sight of Perona, Usopp finally manages to give Kumacy the slip before finding a more confident Perona floating in mid air out the window.
Read More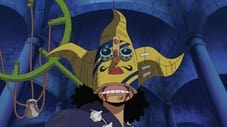
Usopp is forced to go through a gauntlet of Perona's Horo-Horo powers, including an untouchable body, size manipulation, passing right through him and creating explosive mini-Hollows that slowly rip away at his stamina and body. Temporarily turning into Sniperking to finally dispatch Kumacy, Usopp is forced up against a desperate wall until he finally realizes Perona's sudden change. Usopp uses one of his attacks to destroy a nearby wall, revealing Perona's body lying helplessly in her bedroom.
Read More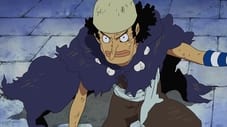
Having deduced that Perona used her Horo-Horo powers to project her spirit, Usopp attempts to fire an attack at it. But the attack appeared to miss with Perona producing a Special Hollow bomb to hold Usopp while she returned to her body. Usopp luckily uses an Impact Dial to absorb the explosive force, using it to take out the Wild Zombie Hippo Gentleman with some injury as consequence. Usopp then reveals that he actually fired an adhesive on Perona's body, beating her by scaring the trapped girl to death with toy cockroaches and an inflatable ten-ton hammer. As Chopper begins to notice Jigoro and Inuppe acting less like Zoro and Sanji, Oars undergoes the same transition and makes his way back to Gecko Moriah. Meanwhile, Zoro and Ryuma's fight is getting intense as Brook tells Franky that Ryuma is actually fighting for real.
Read More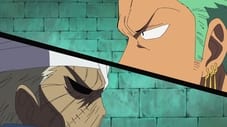
Zoro duels Ryuma in Hogback's lab, while Franky guards over the injured Brook. Neither Zoro, nor Ryuma, can gain any advantage over the other, as they keep matching the other's attack. Their attacks quickly destroy the lab, forcing them to escape the room and continue their fierce duel on the roof. After an intense sword fight, during which the entire roof collapses to the ground below, Zoro finally defeats Ryuma using a technique which sets him ablaze. Sheathing Shunsui, Ryuma throws it to Zoro. Ryuma collapses in a bout of flames and Brook's shadow is finally returned to him, to his great joy. Zoro acknowledges Ryuma's skill as a swordsman and says he wishes he could have met Ryuuma before he died. He also agrees to forget the outcome of their fight.
Read More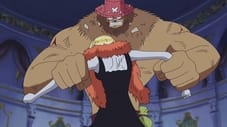
Chopper and Robin are outmatched by Zoro and Sanji's zombies, both of whom have almost completely lost the personalities they acquired from their shadows. Chopper tells Hogback that he had once respected him, but does not anymore after realizing the true nature of Hogbacks experiments. Hogback, however, argues that the zombies are truly alive, and recalls that he had fallen in love with Cindry while she was alive, only to have her reject him in favor of her fiancé. After her death, Hogback agreed to serve Moria in exchange for reviving her. Chopper becomes furious and attempts to attack and purify Cindry. Zoro's zombie and Sanji's zombie begin fighting each other, still unable to get along, and Robin tricks Hogback into telling them to jump out of the tower. Hogback orders Cindry to attack, but Cindry, having temporarily regained her original self, is unable to move. Elsewhere, Luffy is still unable to hit Moria, and Oars arrives at their location.
Read More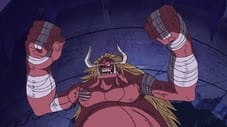
With Oars now a fully obedient zombie, Gecko Moria takes his leave while instructing the giant to hunt down the Straw Hat pirates whose wanted posters are sewn on his arm. Oars attacks Luffy before he escapes to chase after Moria. Hogback without Cindry's conflicted support tries to run away, only to caught by Chopper as Robin helps him set up a suplex before Oars's attack smashed through the ceiling. Hogback then ends up being crushed under Oars's foot before the giant crushes into the chapel as Absalom takes advantage of Sanji's shock to spirit Nami away. Robin, Chopper meet up with Usopp as they run out of the mansion while Oars enters the courtyard while calling the Straw Hat crew out.
Read More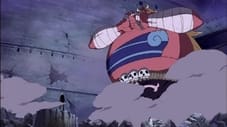
As Abalsom makes another attempt to finalize his marriage to Nami, the other Straw Hats are fretting over Oars hunting them all down. Oars assumes he is kill the Straw Hats and attacks Sanji upon identifying him from his badly drawn wanted poster. While Oars lacks any Devil Fruit power, he is able to use Luffy's attacks to smack Sanji into a building. Oars was about to crush Sanji when Usopp used his Fire Star to set the zombie's head on fire, only to provoke him as Zoro and Franky attempt to fight him. But Oars is too fast and overpowers everyone before destroying bridge where Usopp, Chopper, and Robin were standing. As a wounded Usopp cursed "Luffy" while lying on the ground below alongside his teammates, Oars stood over the seemingly defeated Straw Hats while proclaiming that he is a servant of Moriah. Elsewhere, Luffy's continued pursuit of Moria leads him out of the manor and into the forest.
Read More
Absalom, still battered from his fight with Sanji, attempts to once more seal his marriage to Nami with a kiss before she regains conscious. Lola arrives at that time, telling Nami to leave while pretending to attack her before Abalsom, briefly caught off guard, knocks the zombie out with a furious Nami intent to avenge her friend. Nami manages to win due to a combination of Abalsom's injuries and delusion, checking on Lola who saw through her earlier lie while thanking the girl for her encouragement. Meanwhile, as Luffy continues chasing Moria, Perona comes to and decides to leave on the Thousand Sunny after being told of Oars rampaging through the courtyard. But as Oars starts to search the manor for the remaining Straw Hat members, the ones he just defeated have all got their second wind.
Read More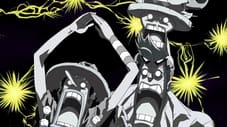
After being updated by Lola, Nami decides to find her crew after helping herself to Thriller Bark's treasure. But she finds the treasure room after while finding two of Perona's subordinates. Meahwhile, as Brook heads to the kitchen for some salt, the Straw Hats attempt to find a means to knock Oars down. The Straw Hats attempt a "docking" maneuver by hanging onto Franky in order to form a "Giant Robot Warrior", but it fails when Robin refuses to participate in what she considers very embarrassing. The Straw Hats combine their strengths to get Oars off-balance and cause him to fall to the ground, enraging him. Elsewhere, Perona's subordinates load the treasure and food onto the Thousand Sunny when they see the a mysterious bear-like figure who requests for Gecko Moriah.
Read More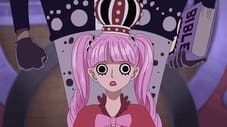
Taking advantage of several weaknesses, including his stupidity and similarities to Luffy, the Straw Hats continue to wear away at Oars despite his continued persistence. While the others were intending to hold off Oars until Luffy takes out Gecko Moriah, Zoro intends to fight the giant to test his new sword Shuusui. Meanwhile, after Nami gained interrogated intel that Perona is taking the Thousand Sunny, she arrive to confront the girl as the mysterious figure makes his presence known. Perona recognizes the figure as Bartholomew Kuma of the Seven Warlords of the Sea, Kuma requesting for Moria before he is forced to make Perona disappear with his ungloved hand due to her defiance. Displaying his unnatural speed to Nami while asking of Luffy's ties to Ace, Kuma takes his leave while telling her of his "choice to be here". Elsewhere, realizing he caught Doppelman, Luffy finds out that he has been chasing after Moriah's shadow the entire time.
Read More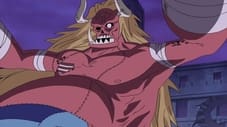
Moria's shadow escapes, leaving Luffy stranded in the forest, as some strange people reveal that they are looking for him. Zoro begins the fight against Oars, revealing the new 108 Caliber Phoenix with his newly-obtained sword, but Oars manages to avoid his attacks. Kuma informs Moria of the appointment of Blackbeard as Crocodile's replacement, and warns him that the Straw Hat pirates may defeat him, too. Moria refuses Kuma's offer to help him, and enters Oars' stomach to guide him against the crew. The crew realize that as Luffy failed to catch and defeat Moria, it is up to them to defeat Moria and Oars before dawn. Usopp runs to the kitchen to gather more salt to purify Oars, but Oars strikes out at him, destroying the passage to the kitchen. Brook, his injuries healed, manages to save Usopp and bring the Straw Hats a large bag of salt.
Read More
The Secret Plan to Turn the Tables! Nightmare Luffy Makes His Appearance
With Moriah's guidance, Oars is better able to counter the Straw Hats' strategies and turn their attacks against them. Franky is knocked unconscious after a failed attempt to fire himself at Oars with a giant slingshot known as Kuwagata and shoot him at point-blank range with Weapons Left. Nami arrives and joins the battle, but Oars demonstrates that he can somehow stretch his limbs, which the crew realizes is Moriah's Devil Fruit powers. Elsewhere, Luffy meets up with the Rolling pirates and their captain Lola the Proposer, whose shadows have been stolen by Moria. Lola has her crew plant all the shadows they captured into him in order to multiply his fighting strength and grant him new skills so that he can defeat Moria. The result is a monstrous version of Luffy, called Nightmare Luffy, that proceeds to reach his crew and take out Moria before the shadows leave his body after ten minutes' time.
Read More
The Straw Hat Crew Gets Wiped Out! The Shadow-Shadow's Powers in Full Swing
Moria explains that he enabled Oars to stretch by stretching his shadow, thereby forcing his body to stretch along with it in order to ensure that the body and shadow are the same shape. Usopp fires Brook out of Kuwagata, with Robin making him spin and Nami electrifying him, but he only does minor damage to Oars and is knocked out when Oars retaliates. Robin attempts to use her powers on Moria, but he attacks her with his shadow and then switches places with it, rendering her attack useless. He then takes her shadow, rendering her unconscious. Chopper discovered that Oars died of frostbite, and that while he does not feel any pain, he can still take damage from their attacks. Sanji and Chopper launch a combo attack on Oars, who then knocks out both of them with Gum Gum Gatling, leaving only Nami, Zoro and Usopp standing.
Read More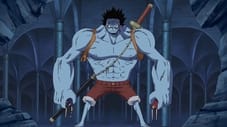
With Zoro risking his own life by distracting Oars before the giant knees him into a wall, Usopp shoots Brook's salt into Oars' mouth with Kuwagata. But Moria's shadow catches the bag and flings it back at Usopp, the bag's contents spilling out before Oars apparently stomped Usopp to death. Oars tries to stomp Nami, only for her to be saved Nightmare Luffy who also saved Usopp at the last second before fighting Oars. While the Rolling Pirates take the unconscious Straw Hats to safety, Nightmare Luffy overpowers Oars to the point of knocking out on Moria with Gum Gum Pistol before sending Oars flying with Gum Gum Storm. The shadows leave Luffy's body, but he appears to have won.
Read More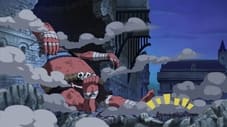
Oars recovers from Nightmare Luffy's attack. However, the Strawhats all get back on their feet, from Luffy to Brook, and launch a final devastating attack on Oars, which ends with Luffy smashing a Gigant Bazooka into Oars' face from above, breaking his spine and finally defeating the demon. Moria, however, gets out of Oars' stomach moments later, and prepares himself for his ultimate technique, Shadows Asgard. By sucking up all of the shadows of all of the zombies on Thriller Bark, totaling one thousand shadows, Moria becomes a grotesque monster, as big as Oars in size with short spindly legs, gigantic arms, and a huge bloated neck pulsating with veins.
Read More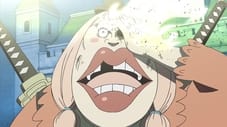
Our Bodies Vanish! The Morning Sun Shines On the Nightmarish Island!
With Zoro telling the frighten Rolling Pirates that Gecko Moriah's Shadows Asgard is nothing but an act of desperation to stall for sunrise at the cost of his mind, Luffy proceeds to attack him in Second Gear. But Luffy only managed to release some of the shadows with Moriah regaining enough of his mind to overwhelm Luffy. But with the Rolling Pirates calling out to their shadows weakening Moriyah, Luffy acts against his crew's pleas by using both Second and Third Gears at once to defeat Moriag with his attack Gum Gum Giant Jet Shell. Though the shadows are released, Moriah's collapse causes the sunlight to hit the unconscious Luffy, Zoro, Sanji, Robin, and the Rolling pirates as they are all set ablaze.
Read More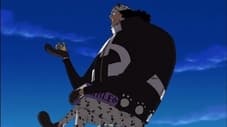
Despite nearly being vaporized, Luffy, Zoro, Sanji, Robin, and the Rolling regain their shadows at the last second along with the rest of Moriah's victims. As Hogback informs Absalom of their leader's defeat, the Straw Hats surround the still unconscious Luffy with Usopp worries that Luffy might hurt himself from facing stronger enemies in the future. As the Rolling Pirates offer to lead Nami to Moriah's treasure, she remembers Kuma before seeing him on the collapsed tower. Contacting his superiors via Transponder Snail, Kuma receives orders from the World Government to kill the Straw Hats and everyone else on Thriller Bark to prevent Moriah's defeat from becoming public. After taking out some of the Rolling Pirates with a strange move that sends several people flying backwards, Kuma turns his attention to Zoro.
Read More
Zoro attacks Kuma, who reveals that he has eaten the Paw Paw fruit, and shows his ability to repel attacks, move considerable distances almost instantly and repel the air to attack his opponents. Zoro is quickly outmatched, and Sanji and Usopp's attempts to help him are rendered futile by Kuma's hard body and ability to block projectiles. Kuma then creates a giant paw print that he compresses, offering all the pirates a chance to survive if they turn over Luffy. But they all unanimously refuse and Kuma detonates his paw print with the explosion from compressed air devastating Thriller Bark.
Read More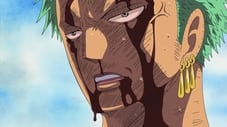
While almost everyone on the island is knocked out in the blast, Zoro slashes Kuma with Shishi Sonson, but sees that it is ineffective, as Kuma is a Pacifista, a cyborg whose body is harder than steel. Seeing that he can no longer fight, Zoro offers his life to save Luffy, saying that he cannot hope to become the world's best swordsman if he cannot protect his captain. Sanji attempts to take Zoro's place, but Zoro knocks him out. As part of his agreement with Kuma, Zoro takes in all of Luffy's pain and fatigue, which Kuma says would kill him if he suffered it on top of his already severe wounds. Zoro takes in the pain, and Kuma leaves, remarking on how Luffy has a loyal crew. Luffy regains consciousness, surprisingly energetic, while Zoro emerges from his sacrifice near death.
Read More
The Promise from a Distant Day! The Pirates' Song and a Small Whale!
Hogback and Absalom escape Thriller Bark with the unconscious Moria, revealing that Blackbeard's Warlord status from defeating Ace. The next day, the Straw Hats celebrate their victory over Moria, but do not know why Zoro is so badly wounded. Sanji hears the story from the Risky Brothers, but prevents them from telling anyone else, saying it would trouble Luffy greatly to hear that Zoro suffered for his sake, but Robin eavesdrops on the conversation. Luffy tells Brook that Laboon is alive, and he is overjoyed to hear it, and begins to think about the time 50 years ago when he and his pirate crew first met Laboon.
Read More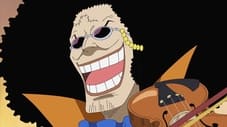
Brook recalls his past, when the whale Laboon started following his pirate ship and befriended the crew. When the crew headed toward the Grand Line, they had no choice but to leave Laboon behind because the danger the sea would present to a young whale like him, but Laboon followed them over Reverse Mountain, anyway. Brook and his captain convince Laboon to stay behind, promising that after they traveled through the entire Grand Line and he grew strong enough to follow them, they would come back and bring him on their adventures. They were unable to fulfill the promise, though.
Read More
Brook recalls the Rumbar Pirates' journey through the Grand Line, where they faced many dangers but still managed to enjoy themselves. The captain contracted an illness and attempted to leave the Grand Line through the Calm Belt with the other infected crew, leaving Brook in charge of the remaining pirates. The journey continued until some powerful enemies defeated the Rumbar Pirates in the Florian Triangle, fatally poisoning them. As they were dying, they sang Binks's Brew one last time, recording it in a Tone Dial in the hopes that Brook would revive with his Devil Fruit power and deliver the shell to Laboon. Back in the present, Brook silently hopes Laboon will wait just a little longer for his return.
Read More
Brook tells Luffy that he is glad to be alive and asks if he can join the crew, which Luffy approves of. All the Straw Hats are shocked by this, except for Zoro, who is sleeping, and Robin, who knew Luffy would accept him no matter what, but they nevertheless welcome him to the crew. Two days later, Usopp and Franky make a grave for the dead Rumbar Pirates, and Zoro lays the broken Yubashiri at the grave. Nami gets a Vivre Card from Lola, which points the way to Lola's mother, a pirate in the New World. Luffy takes out the piece of paper he received from Ace, which is also a Vivre Card, and learns that as it is burning and shrinking, Ace's life is in danger. Believing that Ace can get out of trouble on his own, Luffy decides to head onward rather than go to rescue him, and the Straw Hats sail away from Thriller Bark. As the Luffy and his crew sail away, three enormous and mysterious figure appears in the fog, looking over Thriller Bark.
Read More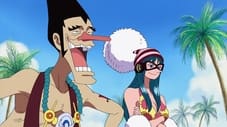
The Straw Hats encounter two young girls who are looking for their father, and Luffy has another run in with the devious Captain Foxy!
Read More
Luffy and the Straw Hats attempt to destroy a floating resort in order to reunite two sisters who possess a blueprint for making jewels!
Read More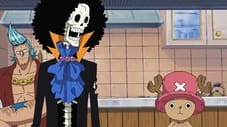
Brook's Great Struggle! Is the Path to Becoming a True Comrade Rigorous?
Brook struggles to adjust to life among the living after so many years alone in the darkness. Can the Straw Hats survive his chaotic attempts to fit in?
Read More
After surviving a terrible storm to reach the entrance to the Red Line, Luffy slugs a mysterious sea monster and Sanji may finally get to meet a mermaid!
Read More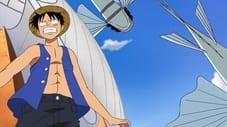
Luffy and the Straw Hats agree to help a mermaid rescue her friend, but the mission gets dangerous when a gang of flying fish dive bomb their boat!
Read More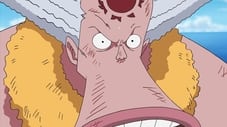
The Straw Hats agree to join Camie’s rescue mission, but her captured friend turns out to be a dangerous enemy from the past!
Read More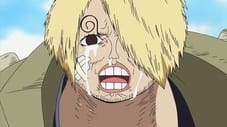
The Straw Hats wage a death-defying battle with a group of flying fish, and Luffy is shocked by the familiar face of their latest enemy!
Read More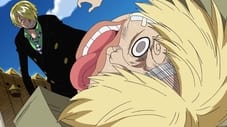
Sanji squares off against his lookalike, Camie shows off just how fast a mermaid can swim, and Luffy defeats a giant bull without even landing a blow!
Read More
After their showdown with Duval, Luffy and the Straw Hats enjoy a hearty meal before proceeding to the site of their next adventure – an island bursting with bubbles!
Read More